2019-01-06

Build farm, version 1 (2015-2016)

Context

Being a developer and having built many thousands of Linux kernels over the last two decades, I can say that build time is something which really counts. I've always been interested in distributed build systems, I started to explore these possibilities in 1996 at the university... Nowadays hardware is much cheaper, there's a lot of choice, and lots of software possibilities as well, starting with distcc.

First serious attempt

When reading this article about a very powerful tiny quad-core device called T034 in late 2014, I figured that it was about time to give it a try. The device features 4 Cortex A17 cores which by then were the fastest ARM cores available. I could test the device in early 2015 and published the results here. By then this device was sold with an Android image, and it took me a long time to manage to get Linux to work reliably on it, and even more to recover correct performance (the RAM was running at 200 MHz stock, the CPU was limited to 1.6 GHz etc). Once reliably achieved, I ordered 4 such devices, which by then were replaced in stores by an exact copy with a new name, CS008, for the same price, about $65/piece :


The devices were assembled together, connected to an L-shaped micro-USB connector. The cables were cut to reduce losses, a DC power meter was installed on each device, glued to the unused HDMI connection, and a 4x4x1cm heat sink was installed on top of the original aluminum thermal plate:


The power was fed from a 19V power supply after conversion via a 5V/3A DC/DC converter:


First disappointment

The devices booted well, installed well, but when starting a kernel build, the power suddenly cut off. I thought that the devices consumed too much, but in reality it was the DC/DC power converters which were not precise enough. The SYR927/928 voltage regulators on the boards support an absolute maximum of 5.5V. Two boards had died in the first few seconds, indicating an unexpected over-voltage caused by the huge power variations on the boards, that the regulators do not react to fast enough, leading to much more than 5.0V when the CPU's power usage drops. I had to order two more boards to replace the defective ones, which were not fixable.

Better solution for the power supply

More serious solutions were appearing in early 2016, like these 5-port 50W USB power supply, that I ordered :


By the time this device arrived, I found quite a robust DC/DC regulator that I could salvage from a dead power supply. It took 12V in, 5.1V out under 30A, exactly what I needed. So I identified the pin-out, connected it on a piece of experimentation board with some decoupling capacitors and USB female connectors :


It's not pretty but it works fine. Since then I've added a 5th connector and the device never failed, powering up to 5 boards at full speed, spreading very little heat, indicating it's extremely efficient.
Overclocking attempts on the boards showed that at 2 GHz they could drain up to 3-4 Amps for short peaks, especially due to losses in the micro-USB connector (up to 450 mV lost there, up to 700 mV between the connector and the on-board regulation chip).

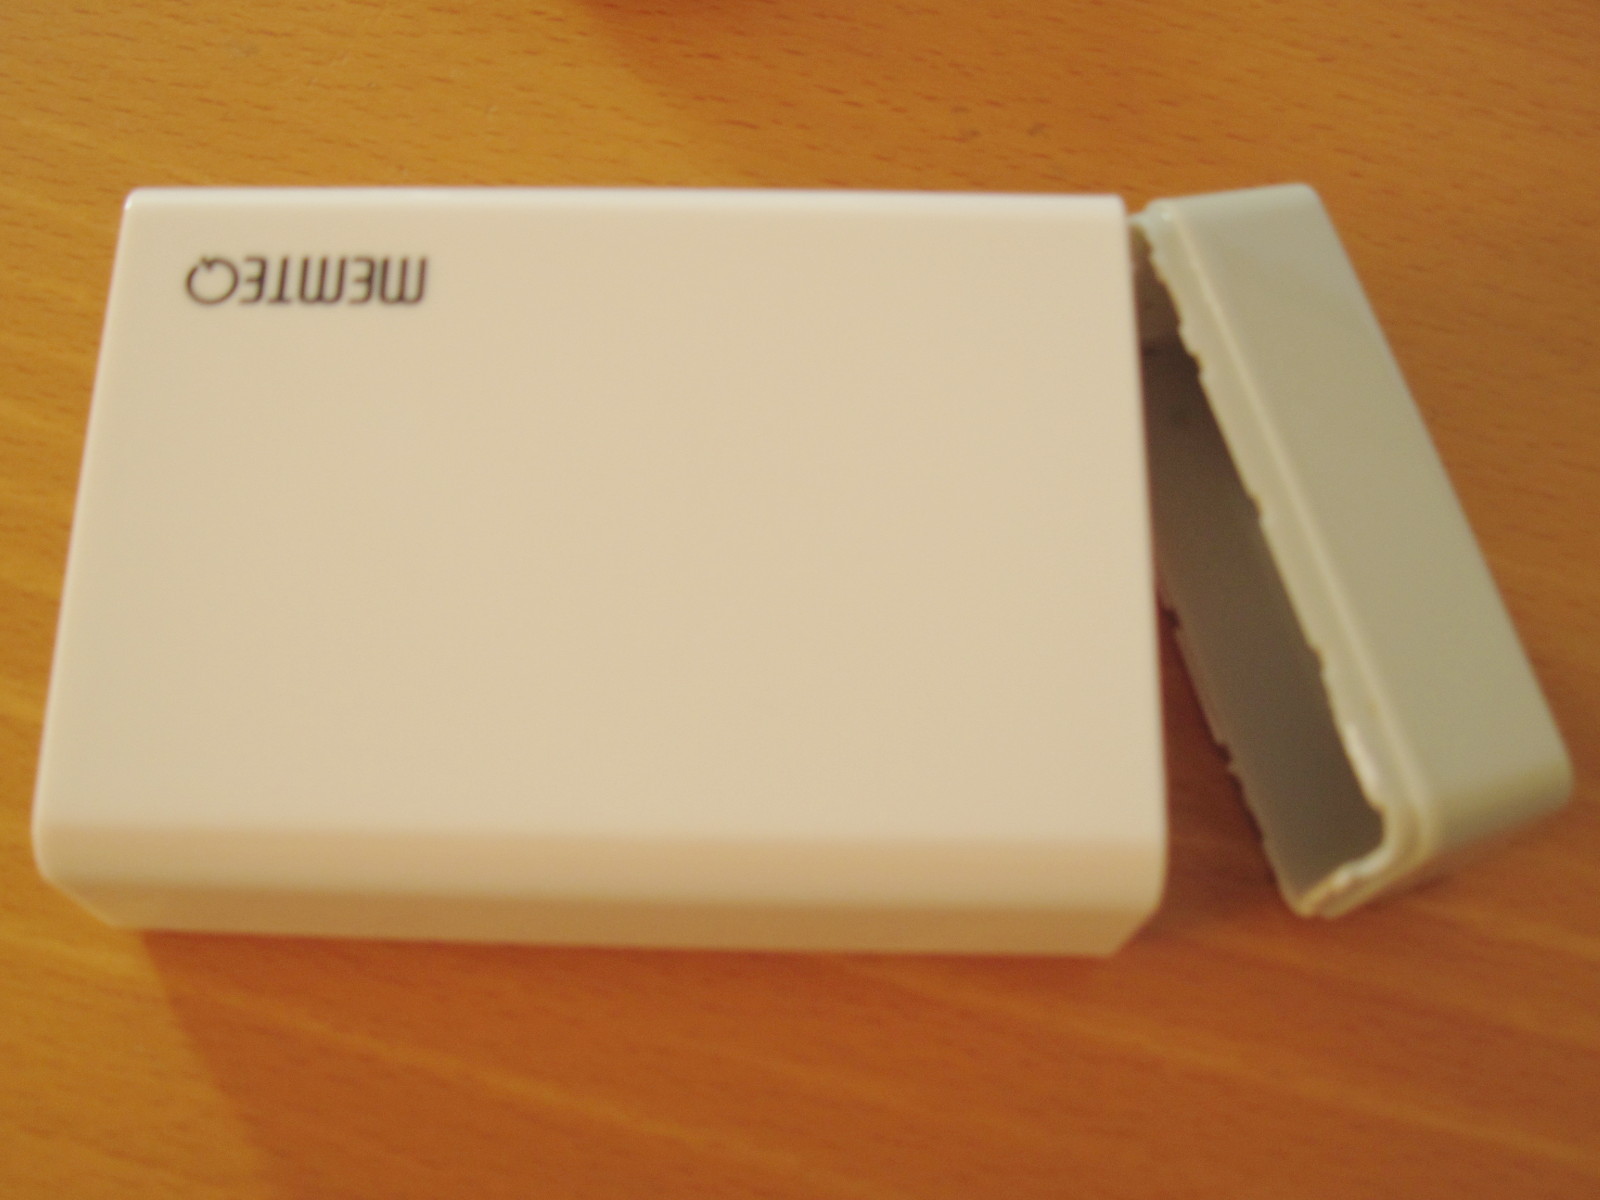
The ordered power supply arrived. It would occasionally cut off during builds. I had to patch it to disable over-current detection. It's well made, there's one such detector per port, made of a 50 mOhm resistor. But this one causes too many losses under high current, so I shorted it. Since then this power supply has always been working flawlessly, and it's much better packaged than the hack above:
Final status

The boards were stacked on top of a 5-port Gigabit Ethernet switch, itself powered by the same power supply; Everything was connected using 20cm Ethernet cables. By the way, I had to order 10 of them to find 5 working ones, the build quality was terrible. The power meters were removed as barely unreadable, and new L-shaped connectors were used :


This solution worked well enough for tests and demos, but the boards would overheat and occasionally hang. It was necessary to use a heartbeat LED trigger to know which ones were working reliably and which ones were hung. The boards were of very low build quality, some had to be fixed due to poorly soldered components, so the freezing issues were not very surprising. The DDR chips were marked with the reference of a DDR3 one while they didn't even match the form factor, they definitely were DDR2 chips. Oh and there was no easy way to keep all the boards together, I tried to make a plastic piece, then hard foam, then I soldered a thick copper plate to all HDMI connectors, nothing was very good nor a durable solution.

However, despite the stability issues, the performance was quite good thanks to the impressive power of the RK3288 SoC. A full-modules kernel build went down from 45mn to 13mn on my laptop (core i5-3320M at 3.1 GHz) when using the build farm. When factoring in the total cost of the solution, around $280, it's impressively efficient.

A solution was thus needed to improve the quality and stability, but the CPU was convincing.

More information

A presentation of this build farm was given at Kernel Recipes 2016 and was featured on LWN. The first one includes the video showing a live build of the complete kernel.

Version 2 of the build farm is described here. Version 3 of the build farm is described here.

2018-12-09

Connecting a USB serial console to WRT1900ACS


Goal

A while ago I purchased a Linksys WRT1900ACS-v2 router to replace my aging 15-years firewall (still running kernel 2.4 on an old VIA Eden board!). This device is pretty nice, it's fully supported by Linux mainline, it offers multi-gigabit connectivity with a real CPU (Marvell Armada 385), has lots of RAM (512 MB) and storage (256 MB NAND), and dual-band WiFi. Yes I know, having NAND flash nowadays instead of eMMC is still annoying to deal with, but I won't need to write often, so I certainly can ignore wear leveling since I'll only be loading the rootfs into RAM. This will be plenty of room to run Formilux with nftables.

I don't have much time to devote to its conversion and I figured that if it's still not in production, it's because I don't want to switch to it before I'm 100% confident about the config and it doesn't have an accessible serial console to allow me to recover from my mistakes. Thus I decided to work on exposing a serial console before finishing its configuration.

Serial Connector

Linksys engineers were really cool with this device, you don't need a soldering iron as they already placed the connector inside. You have remove the screws under the rubber pads and strongly pull apart the blue from the black parts to access it.


There are still a few caveats though :
  • the connector is a 2.0mm pitch connector (JST-PH-2.0 to be precise)
  • the on-board marking is reversed compared to the connector's specification, which creates a lot of confusion and can easily fry an adapter since the power pins are at both ends
  • there is something strange with the Tx output, the device refuses to boot if it detects too strong a pull-up (4.7kohm is too strong). I suspect the device tries to pull the line low during boot to detect such a condition in order to stop in debugging mode or something like this.
Thus it is not as trivial as it seems to simply place the connector outside.

After measuring the voltage on the pins and doing a few attempts, I finally came up with this pin-out :


That's fine, I don't need the +3.3V since I intend to connect this to a USB serial adapter which is alimented by the USB bus. So I can use a 4-pin connector which will cover the connector's pins 1 to 4 (motherboard pins 3 to 6). Such 4-pin connectors are easily found with many motherboards which provide a sound connector for the CD/DVD drive. It's the same! Yes it only has 3 wires but that's what we need : GND, Rx, Tx.


Serial adapter

I picked a CH340G-based micro-USB to TTL adapter like this one, which supports working on 3V or 5V (I've set it to 3V) :


Connecting this adapter to the connector revealed the issue with the too strong pull-UP. So I decided to try to attack it various ways. First, I cannot replace the pull-up on the adapter because it's inside the chip itself. In the end, the easiest and most reliable solutions I found were to use either a 2N4403 PNP transistor or a low voltage AO3407 P-channel MOSFET with a much weaker pull-up. These ones would amplify the WRT's Tx pin negative signal to act  stronger on the adapter's Tx input pin. I tried the two following diagrams and finally decided on the MOSFET one since it features an even weaker pull-up :


Since I had to add components to the board, I wouldn't be able to use the existing 6-pin connector, so I desoldered it to make the PCB thinner. Be careful, on mine the Tx PCB pad went off. Fortunately it's didn't serve as a via and is not used, it just made my task a bit more complicated to figure what pin the signal was going to :


Then I noted the soldered the MOSFET and the resistor on the PCB close to the IC :


And connected the extremity of the wires there. Note if you reproduce this design, I left far too long wires, you could shorten them to 15 cm I think.


Drilling a hole

Every device needs to have at least one hole for a console connector :-)

It wasn't easy to find an accessible place for this connector. I tried to place it in front, but this required disassembling the front panel which I failed to. There are screws below the label underneath but despite these the front panel doesn't come off. It looks like there are molten plastic joints at various places holding it firmly in place. In the end I found an empty place above the front right rubber pad. I drilled a large enough hole to let a micro-USB male connector enter, and placed the adapter there on top of dual-sided thick tape against the internal plastic wall. It looks as if it was made for this, there's very little margin there.


I don't want dust nor random metal stuff inadvertently entering the hole, so I wanted to fill it with hot glue. The difficulty with hot glue and USB connectors is that it tends to fill them up so that it's not possible to insert anything anymore there. So I had the idea to insert the USB connector before filling the hole with glue. But I didn't want my USB connector to be glued. Thus I reused the dual-sided tape protection. By definition it's non-adhesive, so I adapted it to the hole's form and placed it around the micro-USB connector. This way I could plug the hole while filling with the glue. The result is perfect and the adapter cannot move anymore.


Reassembly

Reassembling the device is almost as easy as opening it except when you have an excess of cable as I had. You have to find tiny places to push a few centimeters of cable in order for everything to fit. But once reassembled, it looks very clean, and the connector is very easy to access from the front.


And of course it works fine, I can now attach minicom to it at any moment to watch the boot process (yes I know there's no password now, I'll set one at the end of the installation) :


Now I can finish to install it and play with nftables without fear of being locking myself out ;-)

2018-11-11

Replacing 2 AA 1.5V batteries with 2 AA lithium batteries

Context

My digital camera (Canon A2100 IS) uses 2 AA cells as its power source, as can be seen on the photo below from the review site above :
This was one of the reasons why I selected this model, because I didn't want to have to discover that the battery is depleted when I need it, and AA batteries are easy to find. I replaced the batteries long ago with NiMH rechargeable batteries, but the camera is a bit picky on the input voltage and cuts off long before the batteries are depleted.

Failed attempts

NiMH - NiCd

I tried both NiMH and NiCd batteries just in case the discharge curve would be better on these last ones, but none really stands out of the lot. Below 1.2V approximately, the camera complains.

Lithium 1.5V batteries

I found long ago a very interesting type of 1.5V lithium AA batteries made by Kentli. These batteries are in fact made of a smaller 3.7V lithium battery inside, followed by a DC-DC converter to emit a constant 1.5V voltage. They're pretty good for what they are doing. But they are not suitable for this type of device. Indeed, their output voltage regulator suddenly cuts off once the battery's capacity is too low, and the regulated output prevents the camera from indicating it's going to stop working. Not only it's unpleasant to discover that the battery suddenly is dead when you want to take a photo, but it usually fails with the lens out and exposed without protection which is not fun at all. Ideally such batteries should lower the output voltage near the end so that the powered device detects the situation and can gracefully shut down or warn the user. But for torch lamps and laser pointers these ones are perfect.

Single LiFePo4 cell

I was thinking that there's always some margin in devices designed to be powered by batteries, so if two completely charged AA cells can provide about 3.1-3.2V, surely a single LiFePo4 cell (3.2-3.3V approx) would be fine as well. Such batteries are easily found on the net, sold with a spacer made of a simple wire, to replace the second battery without adding any extra voltage.


The problem with LiFePo4 is that the battery capacity is very low, 600-650 mAh on average so in the end I had an even shorter duration than with the NiMH ones.

Single Li-ion cell

I figured that since the LiFePo4 cells send 3.6V to the device once fully charged, there's probably still a bit more margin, so I decided to try a regular 3.7V Li-ion cell (which reaches 4.2V when fully charged), again with the spacer to replace the second battery.

The first difficulty with these batteries is that their advertised capacity is most always fake, so it's very hard to spot valid ones unless you're willing to pay the price. For this size in Li-ion it's reasonable to expect 800 to 900 mAh, not more. Also, at less than $6 per cell it's a low capacity one. But it's not a universal law since it's possible to find expensive ones which are fake as well :-)

Aside the difficulty to select the correct battery, it turns out that the voltage is perfectly suitable for this camera. The camera only warns once the battery is really depleted, and doesn't suffer from the extra voltage. I figured that I'd just have to spot a serious battery and would have an acceptable capacity with the ability to recharge it with a regular Li-ion charger. But isn't it too bad to lose half of the capacity in the spacer ?

Successful solution found

I spent two hours figuring the best type of batteries I'd need to go further and I ended up picking unprotected and flat battery cells. They are slightly shorter than the regular ones because they're designed to support installation of a small protection PCB if needed. I found this, made by Sanyo, which are apparently genuine given the capacity I tested (about 850 mAh each) :


Then I figured that I could install the two in the reverse direction, and connect them in parallel, negative to negative and positive to positive using wires, and isolate one side of each battery so that the resulting block is still two batteries with a single battery voltage. Thus I tried.

First, I prepared the batteries by cutting pieces of the isolation layer in order to solder them together. For this, the batteries need to be installed flipped and aligned. The minus pole should slightly stand out compared to the plus pole, which will receive some solder :


Then using my soldering iron at maximum power, I managed to solder them together without heating the batteries too much :


Finally, the two positive poles were connected together using a piece of wire. A bit of extra solder was installed on top of the wire to make a button which will help make good contact inside the camera :


And that's done! I now have a 3.7V, 1700 mAh battery that presents itself in the same form factor as a set of two AA batteries and which delivers its whole capacity before the camera shuts down. The main difficulty I had was that the space between the two batteries in the camera is very tight and I had to minimize the solder's thickness to let the battery block in. I also had to install some polycarbonate tape on one side to ensure that the metal part closing the battery holder doesn't short-circuit the positive and negative poles.

Unfortunately I didn't figure how to photograph my camera with the trap opened to see the batteries installed, but it's easy to imagine on this block on the photo at the top.

What is nice is that I can still charge it using a regular Li-ion charger supporting 14500 to 18650 batteries. Let's see how long it will last now.

Modding an RC transmitter to support lithium batteries

Context

From time to time with a few friends we play with these RC cars but the problem is always the same : the transmitters require 4 AA-sized batteries. Since we have 4 cars, it means we need to find 16 charged AA batteries before going outside. It often takes much more time to find and test them as the time required to charge the cars themselves! This made me wonder if it would be possible to replace them with a set of USB-rechargeable lithium batteries that are more easily available and easier/faster to charge.

Hardware inspection

The transmitters look like this (outside and battery holder) :


After removing the 7 screws holding the two sides together, the internal board is accessible. Following the wires with a multi-meter shows that the jack plug is connected to the battery through a diode, and that the battery directly connects to this small LDO voltage regulator through the power switch :


The marking "CA33G" indicates an AIC1734 LDO voltage regulator providing 3.3V from up to 12V in. It is said to feature only a 250mV drop at 300mA. I tried with an adjustable power supply and found that the board consumes only 61mA and that the regulator provides 3.3V starting with 3.44V in (144mV drop only). Better, this voltage drop is maintained for lower input voltages and the board seems to work fine down to 2.5V!

Thus I don't need these 4.8-6V input. Using a single lithium battery from 3.5 to 4.2V will be far more than enough. No need for any DC-DC converter either. And given the low power draw, a small one is usable so that I don't have to modify the battery holder.

Solution

I decided to go with some salvaged cellphone batteries. The one photographed here is a BL-5B with a capacity of 890mAh. It includes discharge protection. I simply had to glue a small dirt cheap USB lithium battery charging board to it (you can have 3 of them shipped for less than $1). Then just solder it to the battery connection pads with hanging wires slightly longer than the battery itself. I measured the self-discharge caused by the charging board, it's around one micro-amp so it will need 100 years to discharge the battery. This saves me from having to install switches or connectors.


It is necessary to put some solder tin on the pads before soldering the wires in order to reduce the total heating time and prevent the plastic around from melting. But that's really all. Oh, and of course, it works :-)

I closed everything, installed the battery inside a small plastic bubble protection bag to save it from moving inside, and I can now quickly charge it simply by opening the battery holder and connecting a micro-USB connector to the battery.

Final note

A small note, the charger used above provides 1A by default, some are sold pre-configured to 500mA (just need to change the 1.2k resistor). It's better not to charge small batteries to strongly or they will not last long. Also the charger will stop around 10% of the configured load, which could be reached much earlier than a full charge for smaller batteries. I've already patched two transmitters this way with batteries I had in stock. For next ones I'll probably use 250mAh batteries made for mini-quadcopters, which will provide 4 hours of operation and support being charged in only 20 minutes.